what is that tiny screw used to fasten the NVMe
drive on a lenovo ThinkStation P3 Tower Gen 2
(Intel) Workstation?
And where can I purchase about ten of them?
what is that tiny screw used to fasten the NVMe
drive on a lenovo ThinkStation P3 Tower Gen 2
(Intel) Workstation?
And where can I purchase about ten of them?
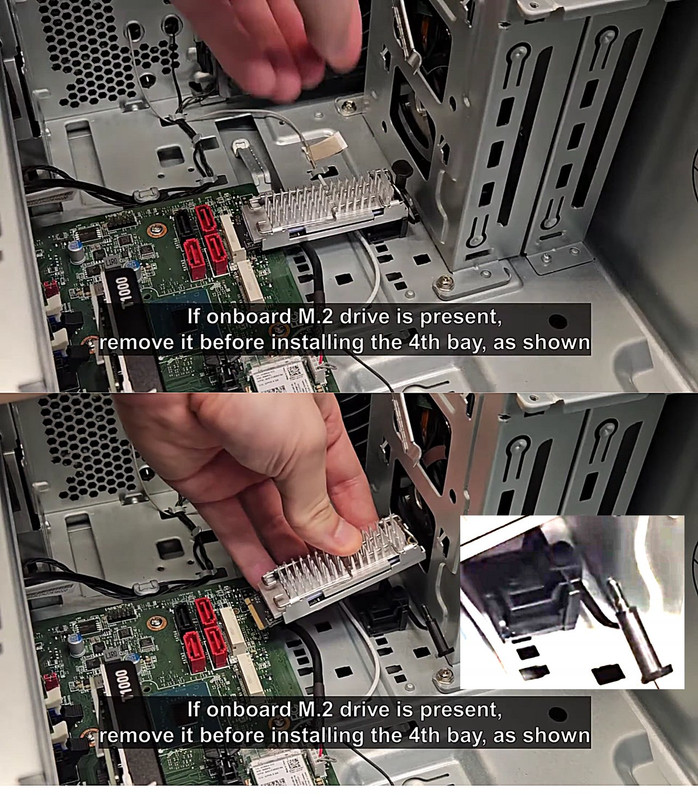
� The "Lenovo ThinkStation P3 Tower Gen 2 (Intel) Workstation"
mounted NVMe drive comes with a super tiny screw.
� Lately, I have been presented with old computers they want
upgraded to something better and faster.� They have a ton
of specialty software on them.� This mean "Key codes?� Source
codes? Disks?� You've got to be kidding me!"� It is an
impossible assignment.
But, being one clever SOB, pull the NVMe drive out of the new
computer, put it in a USB3 carrier, plug it into the old
computer, fire up Clonezilla in rescue mode to copy past
bad spots, and clone the old computer to the new NVMe drive.
Put the NVMe drive back in the new computer, upgrade to W11
and presto.� They are back in business.
Problem, the micro screw.� It is very, very easy to lose.
I take it out with a magnetic screwdriver, leave it on a
magnet until I have to reinstall it.� One wrong shake of
eh hand or bump of the table and it disappears forever.
I can not tell it the turkey is an M1.2, M1.4 or the
larger M2 or if it is ever a metric screw or not.
-T
On 1/20/26 10:27 AM, T wrote:
On 1/18/26 8:40 PM, T wrote:
what is that tiny screw used to fasten the NVMe
drive on a lenovo ThinkStation P3 Tower Gen 2
(Intel) Workstation?
And where can I purchase about ten of them?
Okay, word back from Lenovo is that it is an
M2 by 4 mm.�� And they want 18 U$D for it.
These guys look like it for 8U$D.
100Pcs M2 x 4mm Pan Head Phillips Machine Screws, 304 Stainless Steel https://www.amazon.com/dp/B07YS43PK9
What will I do with the other 99 screws?
| Sysop: | Jacob Catayoc |
|---|---|
| Location: | Pasay City, Metro Manila, Philippines |
| Users: | 5 |
| Nodes: | 4 (0 / 4) |
| Uptime: | 121:44:47 |
| Calls: | 125 |
| Calls today: | 125 |
| Files: | 489 |
| D/L today: |
859 files (365M bytes) |
| Messages: | 76,647 |
| Posted today: | 26 |